OpenLDAP is a software implementation of the Lightweight Directory Access Protocol (LDAP). OpenLDAP is free and open-source software that comes with its own BSD-style license called OpenLDAP Public License.OpenLDAP is a highly customizable LDAP server and supports all major computing platforms.
LDAP Account Manager or LAM is a web application written in PHP for managing users, groups, and organization units. LAM provides an easy way to manage LDAP servers from the web browser.
In this tutorial, We will learn How to Install and Configuration OpenLDAP Server and OpenLDAP Account Manager on Ubuntu
Prerequisites:
Before you begin with this tutorial, you must have the following prerequisites:
- Operating system:
- Ubuntu 22.04 LTS or Ubuntu 22.10
- Ubuntu 20.04 LTS or Ubuntu 20.10
- Ubuntu 18.04 LTS
- User privileges:
- root
- or non-root user with root privileges
- VIM editor installed
- And we stipulate the following:
- Domain: totatca.local
- Hostname: ldap-1
- Full name/FQDN: ldap-1.totatca.local
- IP address: 192.168.1.8 ( recommend static IP address )
- Default OU called: Department
- Default Group called: Groups
Read more:
- LDAP – How to Create OUs Groups and Users in OpenLDAP with LAM
- How to Install and Configure OpenLDAP Client on Ubuntu
- How to Configure Static IP Address on Ubuntu Server
- How to Configure Hostname and FQDN/Fullname on Ubuntu
Step 1 – Update the system
First of all, we need to update the system packages to the latest versions available
sudo apt update && sudo apt upgrade -y
Step 2 – Setting up Hostname & Fullname (FQDN) on your system
Follow this tutorial on How to Configure Hostname and FQDN/Fullname on Ubuntu to configure Hostname and FQDN/Fulname on your system.
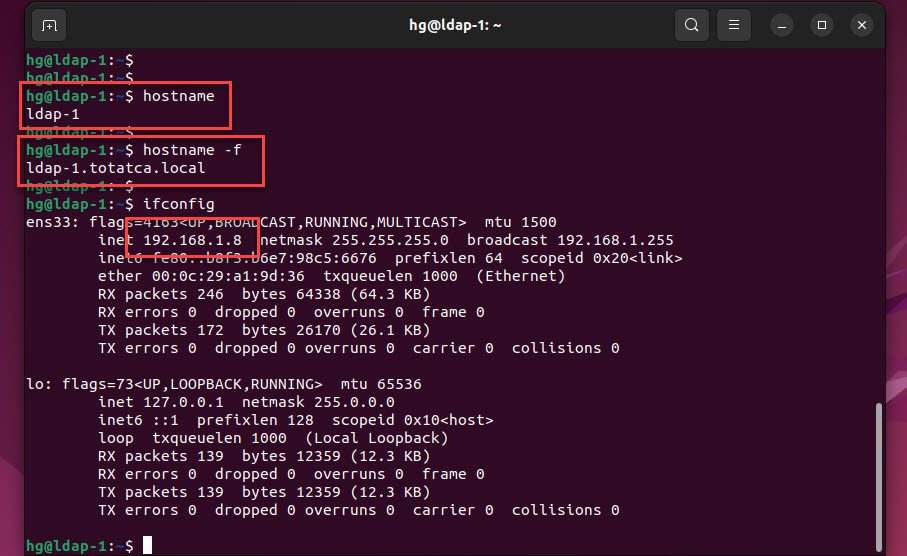
Verify the Hostname and FQDN/Full-name on your system are correct:
hostname
hostname -f
ifconfig
Sample output:
Step 3 – Install and Configure OpenLDAP Server
Everything is done, now install OpenLDAP Server on your system using the following command below:
sudo apt install slapd ldap-utils -y
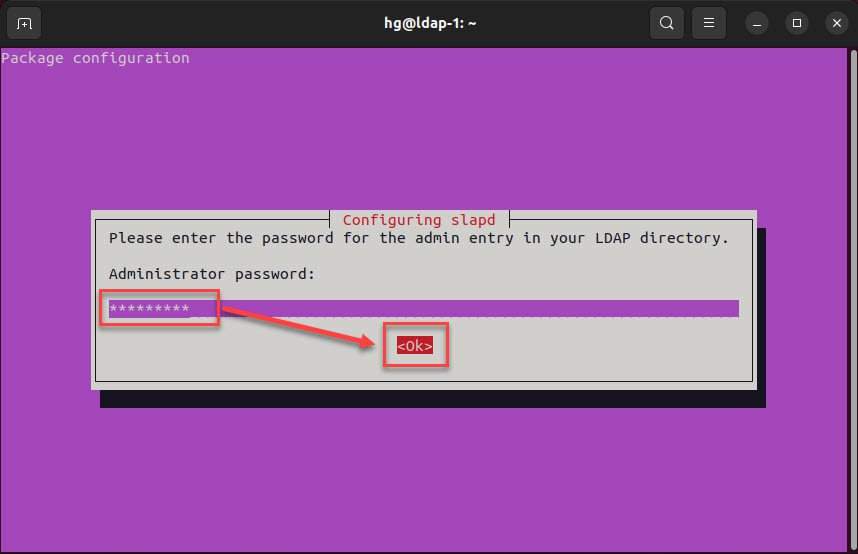
During the installation of the OpenLDAP server, you will be asked to set the admin password, Input your password for the OpenLDAP admin user and select OK
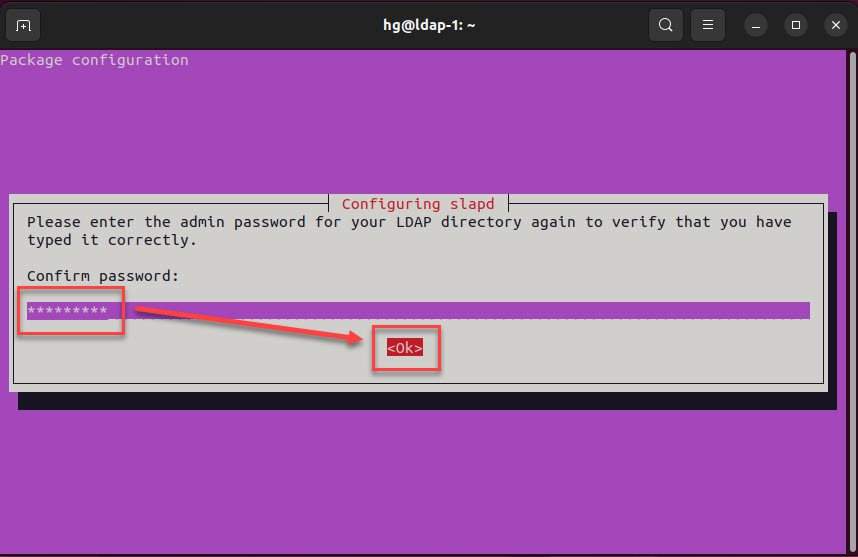
Then confirm your password and select OK
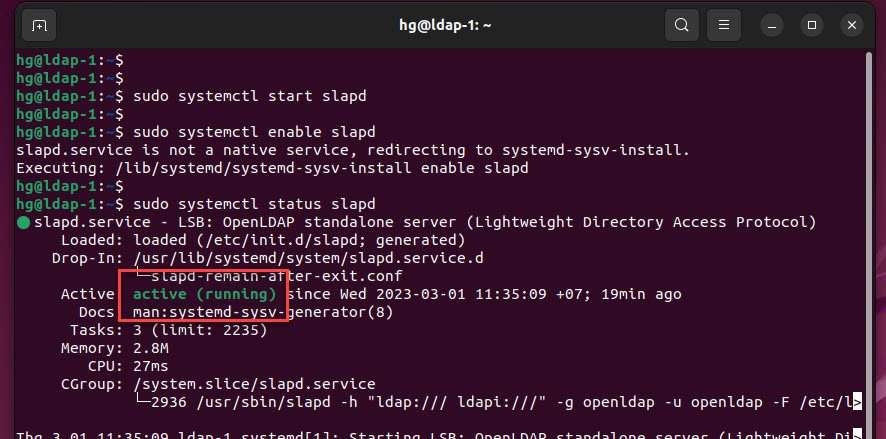
Once the package installer has finished, start and enable OpenLDAP service to auto-start at system restart or boot:
sudo systemctl start slapd
sudo systemctl enable slapd
Check the status of the OpenLDAP service, and ensure it’s running on the system:
sudo systemctl status slapd
Sample output:
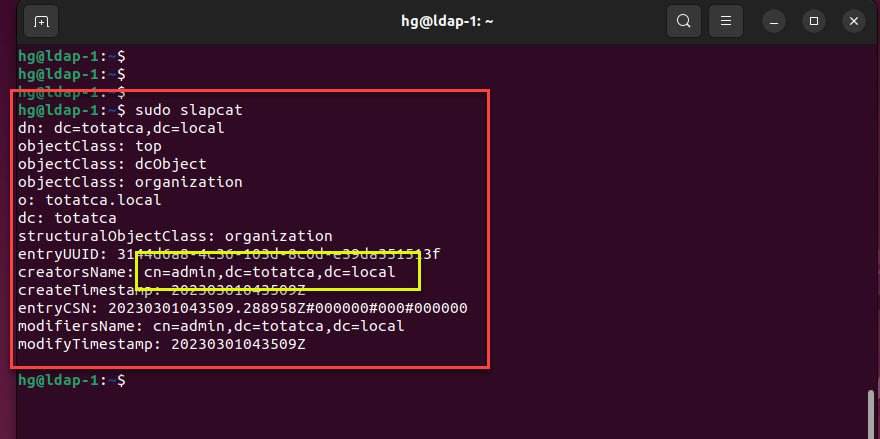
Verify the OpenLDAP server:
sudo slapcat
You should see the base DN of the OpenLDAP server as dc=totatca,dc=local, and the default admin user for OpenLDAP is admin
Sample output:
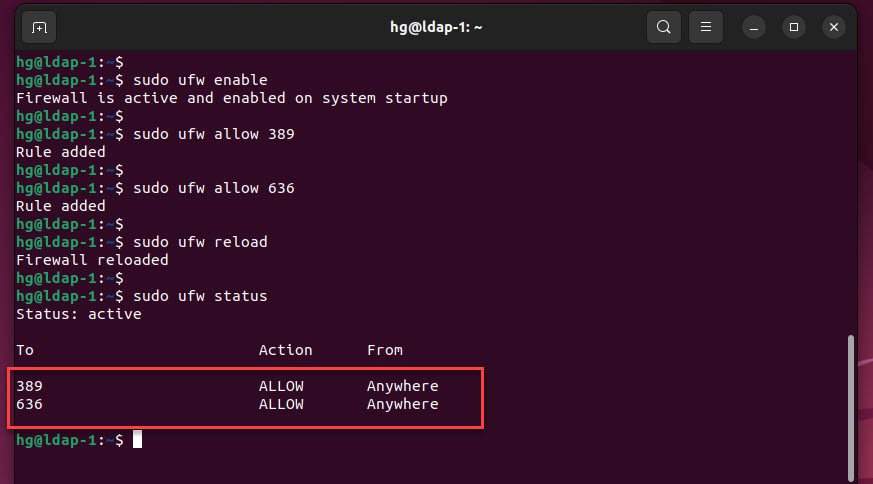
OpenLDAP listens on LDAP port 389 and LDAPS 636, you need to allow ports 389 and 636 through the firewall so external clients can connect:
Skip this step, If you don't want to UFW firewall running on your system
sudo ufw enable # Enable the firewall if it not yet running.
sudo ufw allow 389 # Allow port 389
sudo ufw allow 636 # Allow port 636
sudo ufw reload # Reload UFW fireall
sudo ufw status # Check status of UFW firewall
Sample output:
Step 4 – Install LDAP Account Manager (LAM)
First, We need to install the Apache Web server, PHP extensions, and dependencies packages required by LAM
sudo apt install -y apache2 php php-cgi libapache2-mod-php php-mbstring php-common php-pear
Next, start and enable Apache service to auto-start at system restart or boot:
sudo systemctl start apache2
sudo systemctl enable apache2
Also, enable PHP-CGI PHP extensions
sudo a2enconf php*-cgi
Now, install OpenLDAP Account Manager (LAM) using the following command below:
sudo apt -y install ldap-account-manager
Restart the Apache service to apply the changes:
sudo systemctl restart apache2
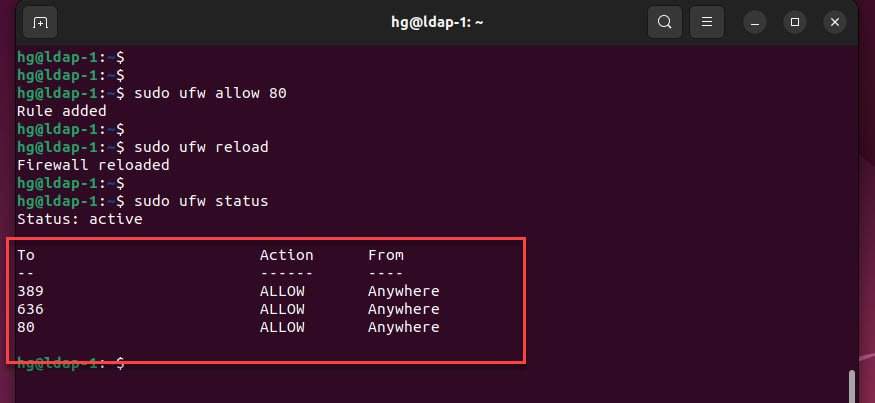
Lastly, allow Apache service through the UFW firewall
sudo ufw allow 80
sudo ufw reload
sudo ufw status
Sample output:
Step 4 – Configure LAM through the web interface
At this point, LAM installed, open your web browser and access the address http://IP-Server/lam
On the page LAM login, click on LAM Configuration
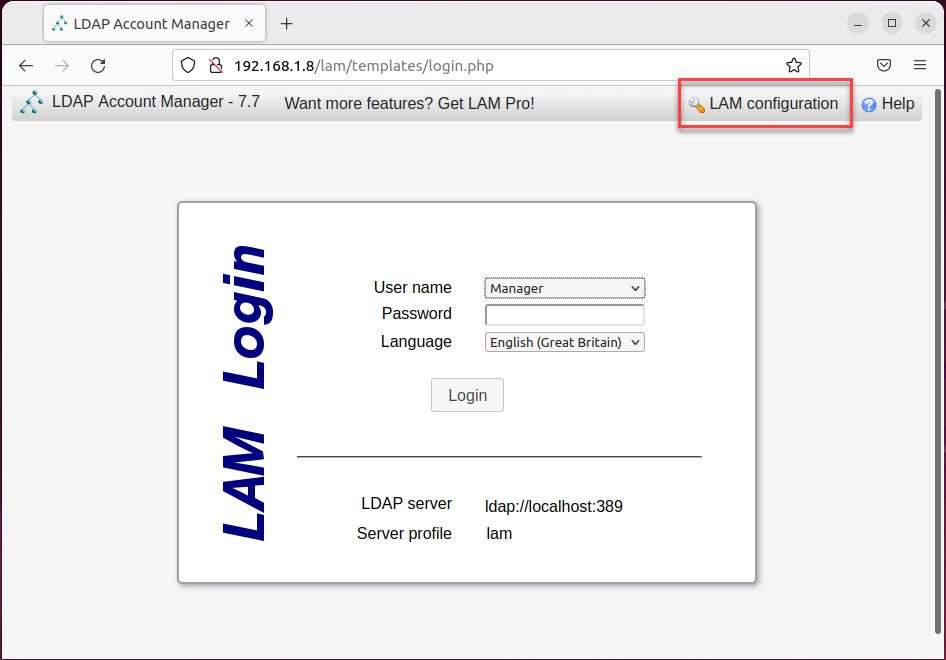
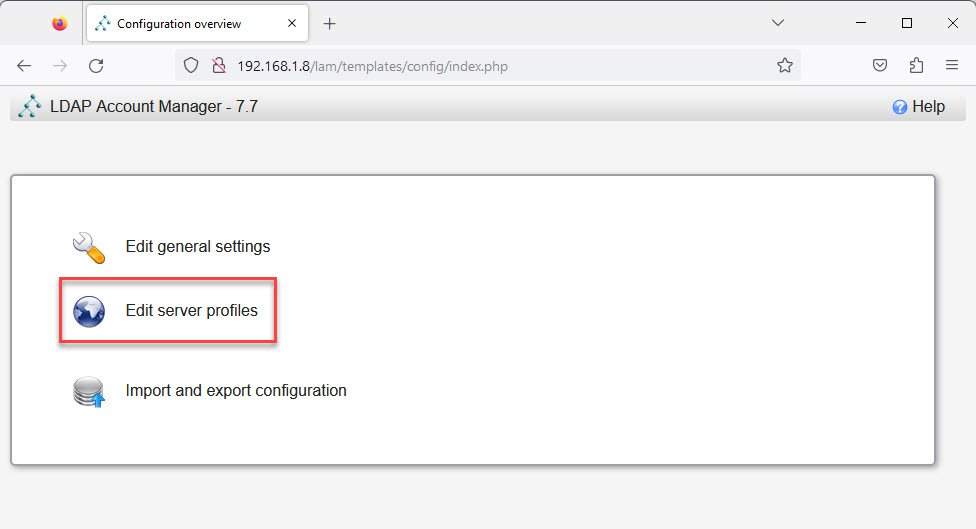
Click on the Edit server profiles button
Login to LAM with the default password is lam and click OK
[CÒN THIẾU]
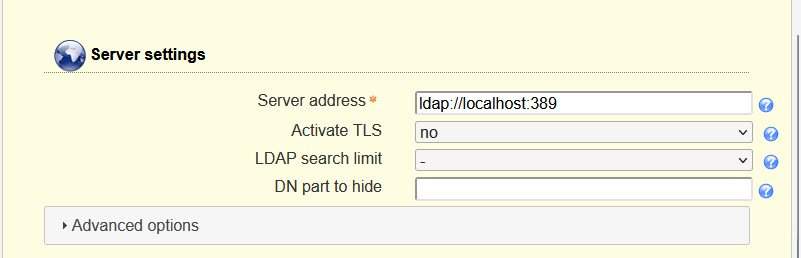
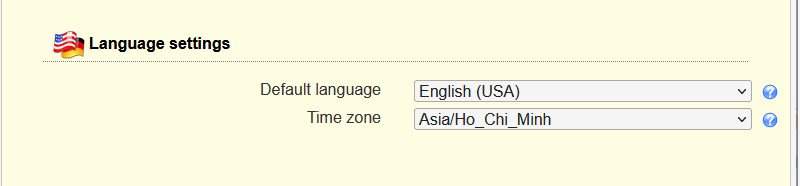
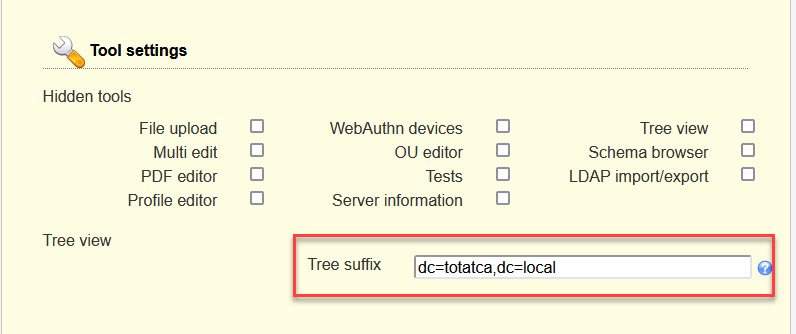
On the page General settings, we will set the sections below:
- In the section Server settings keep the default
- In the section Language settings choose your language and time zone:
- In the section Tool settings :
- Hidden tools: keep the default
- Tree suffix: dc=totatca,dc=local
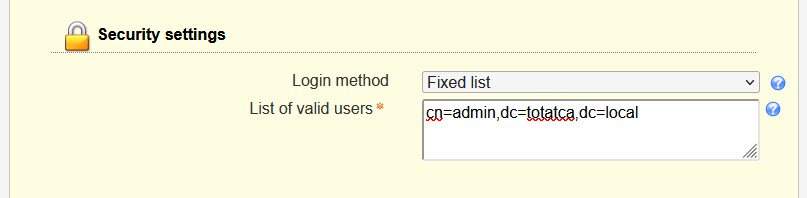
- In the section Security settings
- Login method: Fixed list
- List of valid users: cn=admin,dc=totatca,dc=local
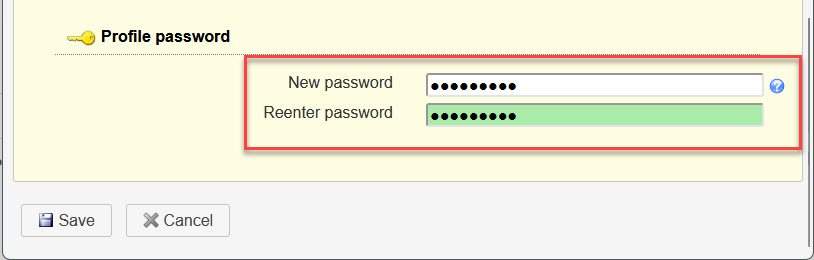
- In the section Profile password, set a new password for the lam user (default is lam )
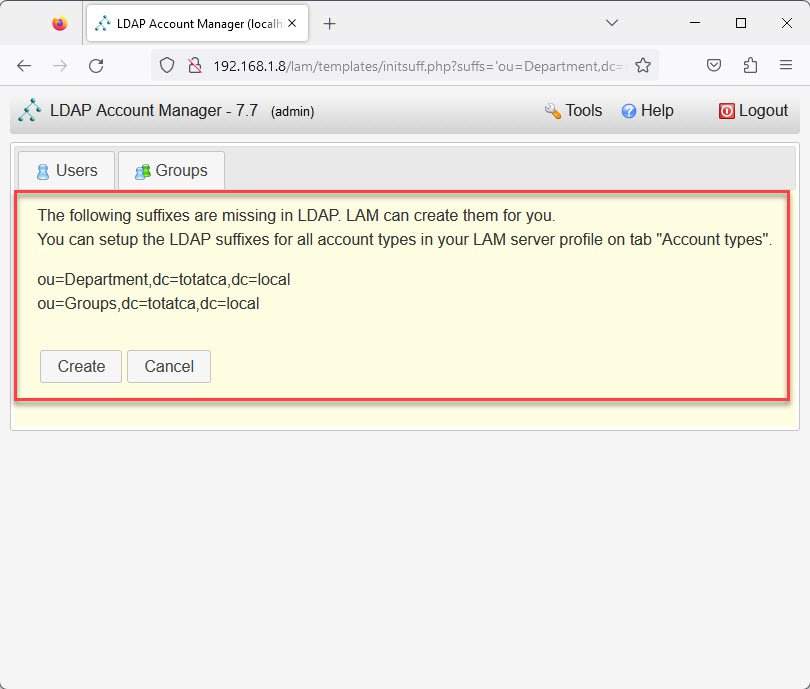
Go to the Account types tab, scroll down to the section Active account types setup as below:
- Users:
- LDAP suffix: ou=Department,dc=totatca,dc=local ( Create an OU (Organizational Unit) parent for your LDAP server)
- Others: keep the default
- Groups:
- LDAP suffix: ou=Groups,dc=totatca,dc=local
- Others: keep the default
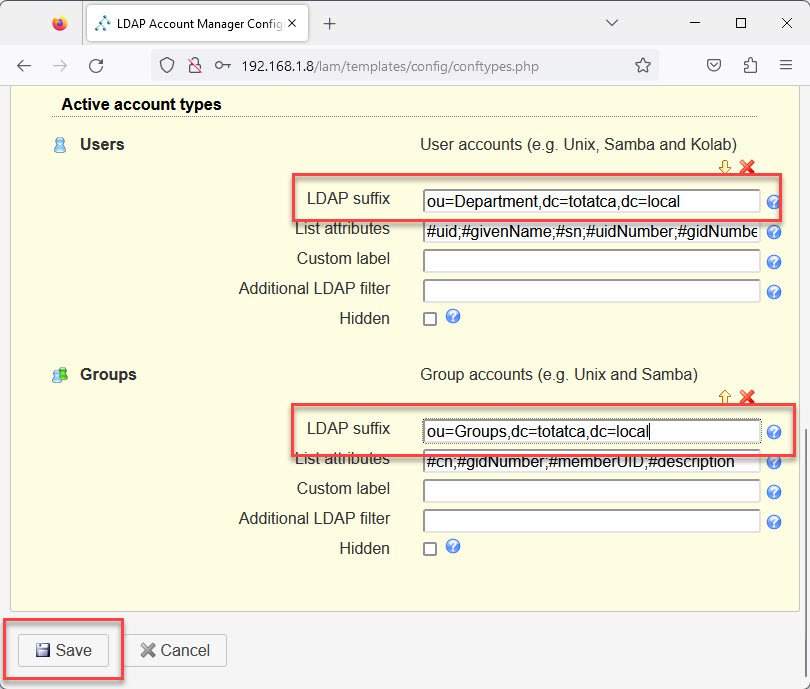
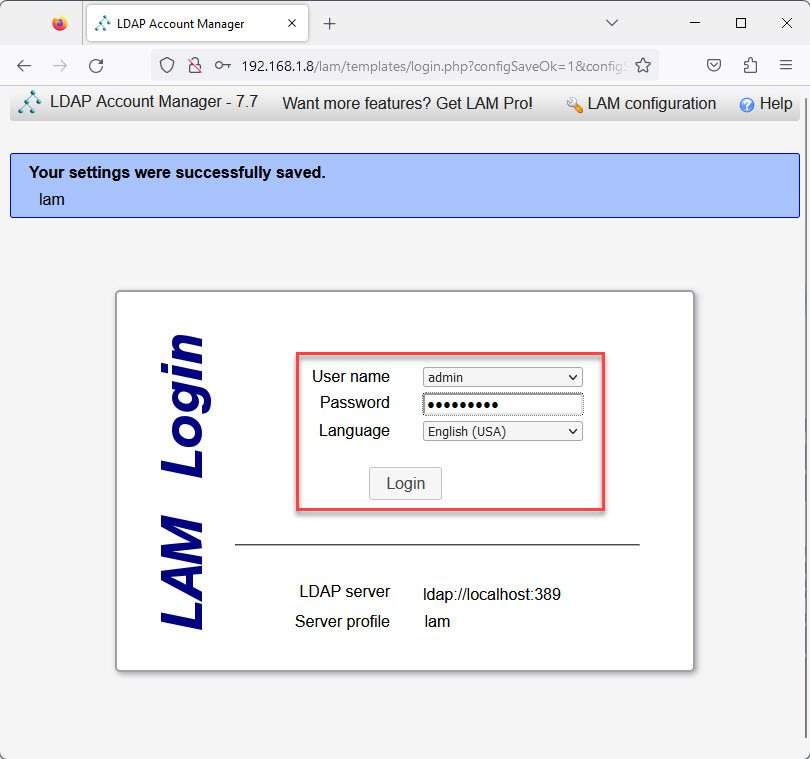
Then, click the Save button to save the changes on the default profile lam, and you will be redirected again to the LDAP Account Manager login page, enter the password of the admin (OpenLDAP admin in step 3) user and click Login
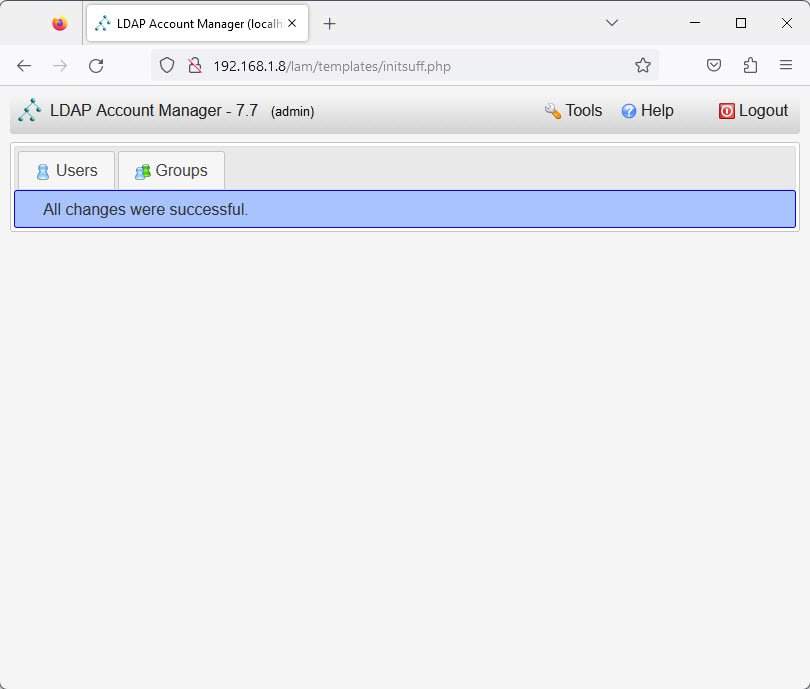
Click the Create button to create the structure OU and Groups
Success !!!
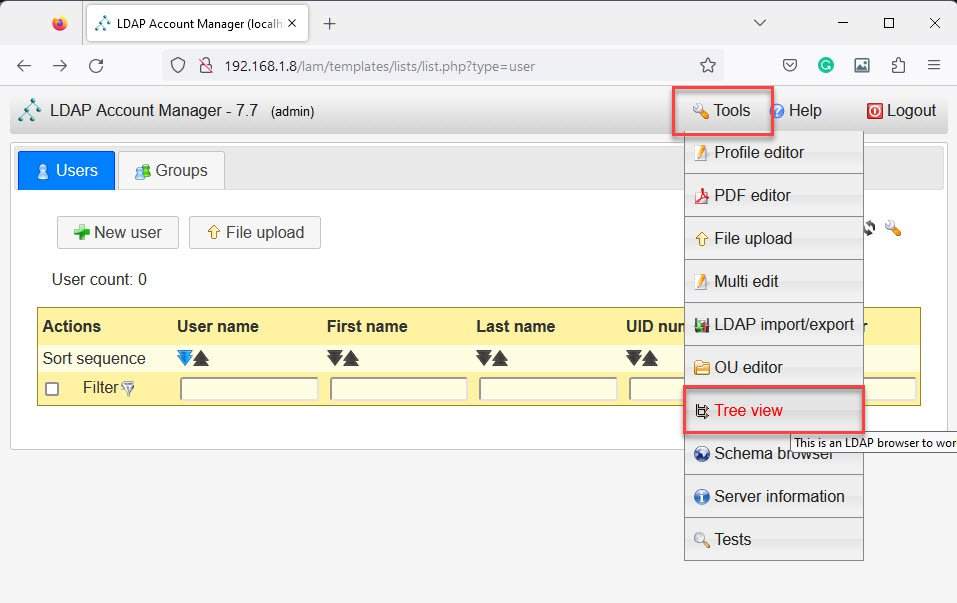
To verify the structure of your LDAP server, hover over the Tools button – select Tree view
You should see the LDAP directory tree similar below:
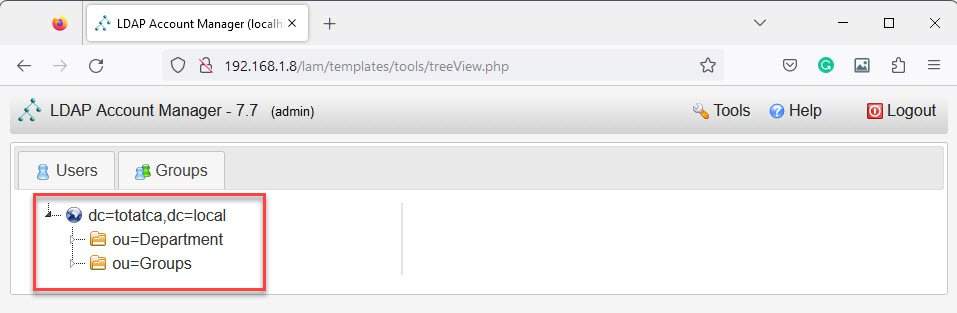
That’s it. You have successfully installed OpenLDAP and LDAP Account Manager on your server.
Next tutorial:
- How to Create OUs – Groups – Users on OpenLDAP Account Manager – updating
- How to Install and Configure OpenLDAP client on Ubuntu – updating