A native Zabbix agent, developed in C language, may run on various supported platforms, including Linux, UNIX and Windows, and collect data such as CPU, memory, disk and network interface usage from a device and ships it to the Zabbix server for visualization.
In the previous tutorial, We installed success Zabbix Server on another server.
In this tutorial, We will learn How to Install Zabbix Agent on Ubuntu Client.
Read more :
- How to Install Zabbix Server 6 LTS on Ubuntu 22.04 LTS | 20.04 LTS | 18.04 LTS
- How to Add Linux Host on Zabbix Server
- How to Install Zabbix Agent on Windows and Add Windows Host on Zabbix Server
Applies to:
- Ubuntu 22.04 LTS or Ubuntu 22.10
- Ubuntu 20.04 LTS or Ubuntu 20.10
- Ubuntu 18.04 LTS
Prerequisites
- Zabbix Server installed on another server
- User privileges: root or non-root user with root privileges
- VIM editor installed on your system
For example, We will define as below:
- My Zabbix server installed
- Zabbix version: 6.0 LTS
- IP address: 192.168.1.18
- My client:
- OS: Ubuntu 22.04 LTS
- Hostname: server-1
- IP Address: 192.168.1.19 (recommend static IP address)
- User privileges: root or non-root user with root privileges
Step 1 – Update system
To update your base system with the latest available packages execute the command below:
sudo apt update
Step 2 – Add Zabbix APT Repositories
Access Zabbix Official Repository choose the Zabbix version want to install and copy the linked repo correctly with your OS version.
In this example, I choose Zabbix 6.0 LTS on Ubuntu 22.04 LTS
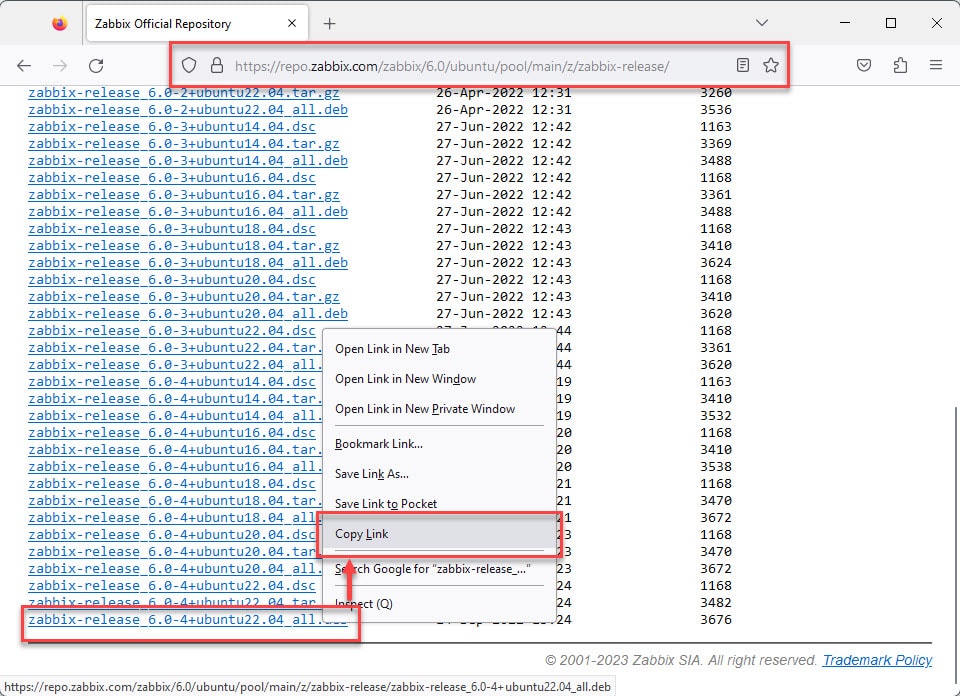
After get link, run the command below to download zabbix-release file
wget Link_in_step_above
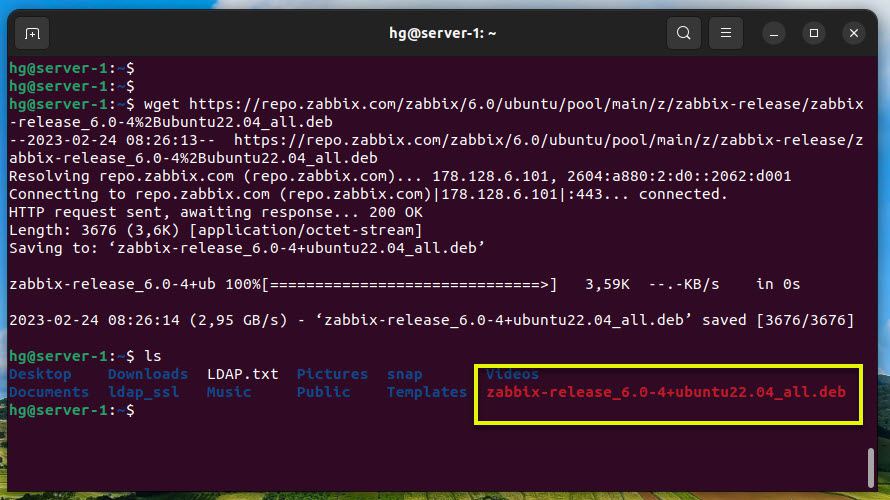
### Example with Zabbix 6.0 and Ubuntu 22.04
wget https://repo.zabbix.com/zabbix/6.0/ubuntu/pool/main/z/zabbix-release/zabbix-release_6.0-4%2Bubuntu22.04_all.deb
Make sure it’s downloaded:
ls
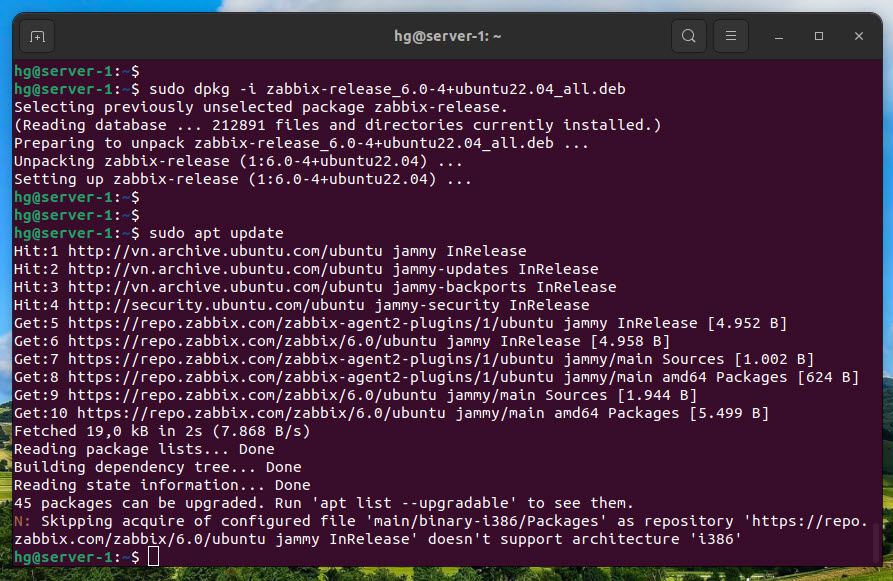
Now, install Zabbix APT repositories
sudo dpkg -i Name_Of_Zabbix_Release_File
### For example with Zabbix 6.0 and Ubuntu 22.04
sudo dpkg -i zabbix-release_6.0-4+ubuntu22.04_all.deb
Next, re-update system repositories
sudo apt update
Step 3 – Install Zabbix Agent
With the Zabbix release installed, run the command below to install Zabbix Agent:
sudo apt install zabbix-agent -y
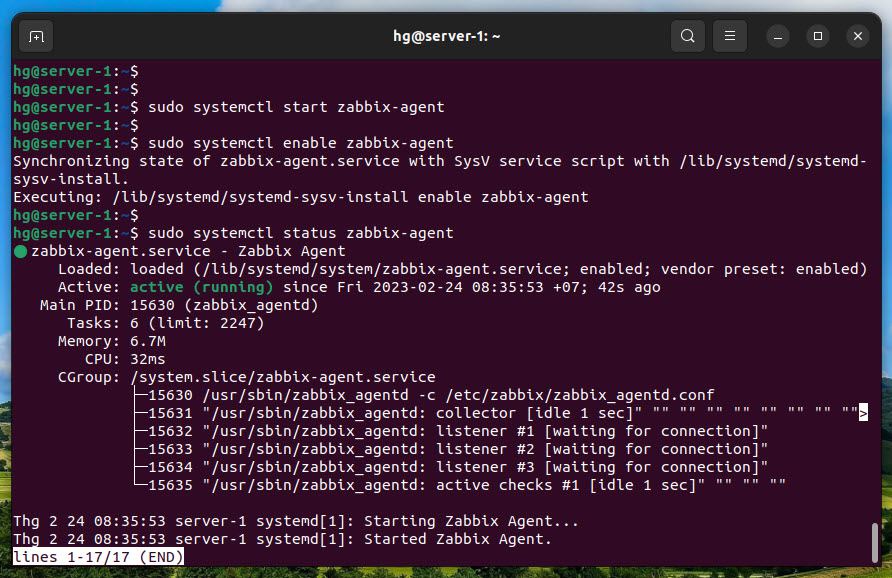
After installation success, We need to start and enable Zabbix Agent service to auto-start on system restart or boot
sudo systemctl start zabbix-agent
sudo systemctl enable zabbix-agent
Check status of Zabbix Agent, Ensure it’s running:
sudo systemctl status zabbix-agent
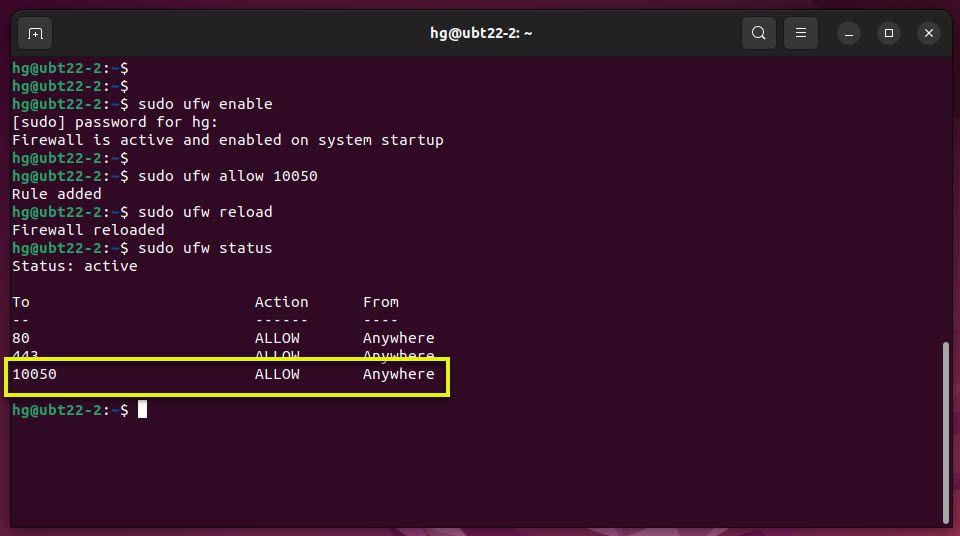
Zabbix-agent listens to port 10050, we need to allow port 10050 through the firewall
### Skip this step if you don’t want UFW firewall run on your system
sudo ufw enable ### Enable the firewall if it not yet running.
sudo ufw allow 10050 ### Allow port 10050
sudo ufw reload ### Reload Firewall
sudo ufw status ### Verify
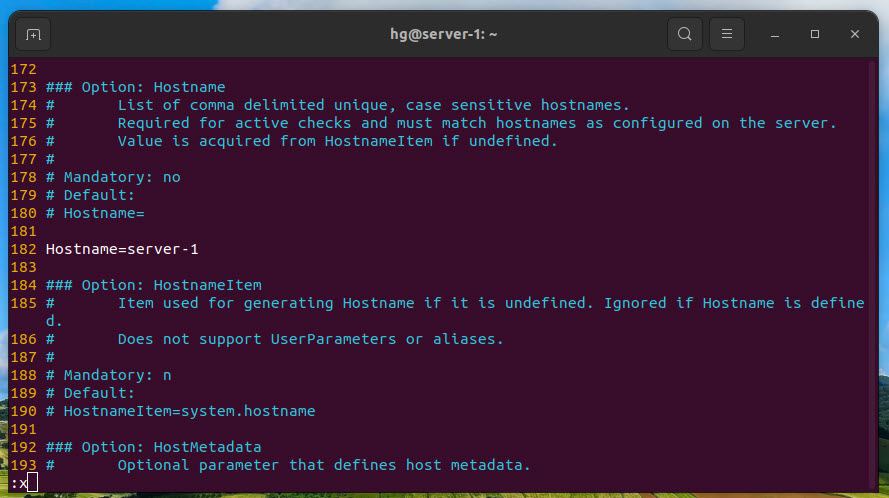
Step 4 – Configure Zabbix Agent
To configure the Zabbix agent open /etc/zabbix/zabbix_agentd.conf file
sudo vim /etc/zabbix/zabbix_agentd.conf
Find and update the below lines:
Server=192.168.1.18 ### IP-of-Zabbix-Server
Hostname=server-1  ### Host-of-Client
Don’t forget save and exit file by press Esc :x Enter
Then restart Zabbix Agent service for change to take effect
sudo systemctl restart zabbix-agent
That’s it. You have learned to Install and Configure Zabbix Agent service on Ubuntu system
Step 5 – Add Ubuntu Host on Zabbix Server
In the last step, You need to add an Ubuntu host on Zabbix Server to monitor the client.
Thank you for reading !!!